Get Expert, Affordable Help For Your Computer Problems

Thursday, March 7, 2013

How to manually remove a Trojan horse virus


Online virus removal or virus removal with your installed antivirus are always preferable. But there is also a way to virus removal manually through in your PC.

It is quite difficult sometimes to remove a Trojan virus from your computer, even if you're using good anti-virus software. I actually had this problem when the software I used could not remove the Trojan virus. After several tries, I decided to manually delete the virus.


After doing some research online I found that whenever you have this problem, chances are the file might be hidden and that is the reason why the software might be unable to delete or quarantine the virus. These are the steps I used to remove this Trojan from my computer.

Steps:

1. Locate the name of the Trojan virus in the scanning report after you run the software.

2. Copy the name of the file that contains the virus.

3. Perform a Windows search by clicking Start, then Search.

4. Finally, click the link marked "all files and folders" and paste the name of the Trojan virus in the search box. Find it and delete.

In this Microsoft support blog you can also find, How to remove a virus that renames & corrupts the users files >>



Do Macs need antivirus security?


There's no denying that Macs are a tough nut to crack. Mac include some very strong security-minded features what you will not find on Microsoft windows operating system/PC, like encryption/deception for hard drive, built-in antivirus and anti-phishing technology, sandboxing features that limit what stand-alone programs can do to your computer, administrator password and more.

Mac operating system computers are often advertised as being immune to viruses and it do not suffer from as many viruses like Microsoft operating systems but it doesn't mean that it is completely immune and no need for scan & check you computer for virus removal.

If you using internet at daily basis, then it is no guarantee that your Mac computer will secure and safe. There are many ways to prevent your computer from being infected with spyware, malware or viruses, and keeping up with these security measures can help your new Trojan threats Mac user’s computer virus free.

Step1: Always update your Mac OS with recently updated pack by Apple or you can you can set automatically updating method for update operating system for re-build or discovered new changes.

Step2: Never think that Mac has no need firewall for protection against attack from web. Set up a firewall on your computer to prevent Internet intruders from easily accessing unprotected files. Mac computers come with preconfigured firewalls; you can modify firewall setting according to your usages.

Step3: Never use any untrusted or unknown website for download application. Configure your Mac computer to alert you when you are about to download a potentially harmful application.
Step4: For make updated and protected with latest updated feature by Apple, take subscription from Apple O/S official site for product security issues before updates are published through the Mac update service.

Also find some more security tips for Mac O/S like How to Manually Find Spyware on a Mac >>

Thursday, August 23, 2012

How to schedule a task in Microsoft Windows 7


There are certain programs like antivirus or disk cleanup on your Windows 7 computer that you might have to use on a regular basis as they help you maintain Microsoft Windows 7 for the enhanced performance and speed and save your time and money as well. However, you cannot pay attention to and spend all your time doing every maintenance task or running virus scans regularly and at the same time you cannot leave your computer unattended and unmaintained. So, what should you do? 

Follow these Windows 7 support tips to schedule a task in Microsoft Windows 7. Find the steps below -

Step 1: Click the Start button and point to Control Panel. When in Control Panel, click System and Maintenance. In System and Maintenance, click Administrative Tools and then double-click Task Scheduler.

Step 2: Alternatively, you can open Task Scheduler by clicking the Start button and typing ‘task scheduler’ (without quotes) in the Start Search field and open task scheduler. Also find here how to share internet in Windows 7 with bluetooth.

Step 3: When in the Task Scheduler window, click the Action tab and point to Create Basic Task. In the Create Basic Task Wizard dialog box, type the name of a program that you want to schedule a task for. In the Description box, describe the action for program (optional and not mandatory). Click the Next button afterwards.

Step 4: Choose any of the options viz. Daily, Weekly, Monthly, or One Time. If you scheduling task for a program (for example, Windows Media Player), select either When the computer starts or When I log on. If you are scheduling a specific event-based task, click the When a specific event is logged button, and click the Next button. Get here how to fix Windows 7 low volume problem.

Step 5: In the Action window, click the Start a program button to start a program and then click Next. You can any of the three options viz. Start a program, Send an e-mail, and Display a message as desired. Click the Next button when done. When prompted, click the Browse button and look for the program that you want to open and select it and click the Next button to continue. Here you will see the summery of your scheduled task. 

Step 6: Click the Finish button to finish scheduling a task. Also find here why DVD drive not working in windows 7.

Next time when you will start your Windows 7 computer, the scheduled task will automatically start running. If you face difficulty running a scheduled task, contact Microsoft Windows support. 

See also: How to fix "Cannot Connect to the Internet" issue in Windows 7 >>

Wednesday, August 22, 2012

How to install a HP printer on Mac


The installation of a HP printer for a Mac system is a simple process. HP printer models are generally used with Windows operating system, but they can also be set up quickly on a Mac operating system.

Follow simple and appropriate Mac support tips as given below to install HP printer to your Mac system-

How to install a HP printer on Mac
Step 1: Before installing HP printer on Mac, make ensure that which Mac O/S you are using currently. If you have Mac X10. 5 Leopard, you don't need to download & install HP printer driver. HP printer drivers pre-integrated with Mac X10. 5(Leopard) operating system. 

If you have any other version or driver not pre-integrated with Mac system, download driver from Apple’s website (macupdate. com).

Step 2:  Now simply connect HP printer usb cable to your Mac system and enter the installation CD into your Mac system CD/DVD drive.

Step 3: 'HP Installer box' will be open. Click on 'Continue' button.

Step 4: Click 'Agree' to accept software license agreement and click on the 'Continue' button.

Step 5: Now select your printer model from the list and click on 'Continue', and the 'Yes' button in the 'HP Customer Participation' popup.

The printing device will now be set up to your Mac system. Close the installation window and test a print page to ensure the printer has become installed correctly.

See also: Do Mac need antivirus security? >>

Monday, August 20, 2012

How to fix sound problem in HP Pavilion


If you are experiencing issue with HP Pavilion sound output, there could be many of reason for that. Sometime it could be cause of hardware fatal and sometime it can occurred from software problems. Get here some additional help to fix HP laptop freezing problem.

Find here number of alternatives that can possibly fix the issue. Get the steps below -

How to fix sound problem in HP Pavilion
Step 1: Before taking any technical step, first ensure that speaker is turn on and mute button is disable. Also check your system audio jack. Sometime you can't hear sound from speaker because the main issue with the audio jack. You can also plug a headphone to check for any issue with the audio driver and software.

Step 2: Now you need to check the system audio driver is working properly or not. Simply go to 'Start -> Control Panel -> Administrative tools -> Computer management -> Device manager'. Now find here 'Sound, video and game controllers', right-click on your sound device and select 'Properties'.

Step 3: Now click 'Driver' tab and check that what driver is currently installed and it is working properly or not…also find here how to fix webcam problems in hp laptop.

Step 4: Update the audio driver now still the device says it is working properly because sometime the driver might be causing this problem. Follow to step 2 again, select the option to automatically update the driver, or search the HP support website for a new driver to download and install.

Don't forget to restart you HP Pavilion after successfully installed new driver.          

Friday, August 17, 2012

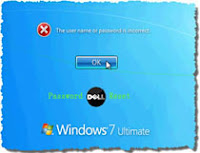
how to reset Dell Inspiron laptop password


Dell Inspiron comes fully equipped with latest Windows operating system, which you can configure using an administrator password. Windows operating system make it very easily to reset your Dell Inspiron laptop password. Get here how to reformat Dell Inspiron hard disk.

Modifying your private data frequently can decrease the possibility of someone opening your system without your knowledge. It takes few minutes to change the administrative password on your Dell Inspiron laptop. Get Dell help tips below -

how to reset Dell Inspiron laptop passwordStep 1: Simply go to 'Start -> Control Panel'. A new window eligible 'Pick a Category' will pop up. Click 'Performance and Maintenance' category.

Step 2: Click 'Administrative Tools' under 'Performance and Maintenance' category. A new window will appear with multiple shortcuts and icons. Get here how to fix bluetooth problem in Dell Inspiron 1525.

Step 3: Click on 'Computer Management' icon. 'Computer Management' windows will appear. Now click on 'Local Users and Groups'. Click 'Users' folder from the right side of the window.

Step 4: Click 'Administrator' account and go to 'Action' then 'Set Password'. 'Set Password for Administrator' window will appear. Click the 'Proceed' button.

Step 5: Now type and save your new password here and click 'OK'.

Thursday, August 16, 2012

How to reformat Dell Inspiron hard disk

If your Dell Inspiron system is suffering from virus problem or the operating system is corrupt, then hard disk reformatting is the best way to fix it. Get here how to make Dell Inspiron run faster.

If you come across an issue with Dell Inspiron that you cannot fix, given Dell help guide is a perfect solution to fix it. With following this guide, you can easily clear all the data from Dell Inspiron hard disk. Get the steps below -

Step 1: First shut down your Dell Inspiron system completely and start again. Click 'F12' at start-up to bring up the one-time boot menu.

Step 2: Now enter the Dell CD disk into CD/DVD writer.

Step 3: Hit 'Enter' when prompted to boot from CD. Now Windows setup will automatically start, it can take few minutes for proceeds.

Step 4: Click 'Next' after enter the preferences in the initial installation screen of Windows (for instance, language)… Is your Dell Inspiron system facing randomly shutting down problem?

Step 5: Click 'I accept the licensing terms' checkbox and click 'Next'.

Step 6: There are two options, 'Upgrade' and 'Custom'. Select 'Custom' option for Dell Inspiron reformatting.

Step 7: A new window will open where all hard disk partitions appear. Remove all partitions before reformatting, click 'Delete' to remove. If you don't have any partitions, skip this step.

Step 8: After removing all the hard disk partition, click 'Hard Drive' then click on 'Format' button. Get here how to factory reset Dell Inspiron.

This process will take some time for erasing all the data form your hard drive. Now your Dell Inspiron hard disk has been reformatted. Now click 'Next' and install a new operating system on this fresh hard disk.

See also: